Something old is new again. Keyhole Gardening has (re)gained popularity. It originated in Africa out of necessity. Creating an organic recycling tank in the center of a garden to help grow vegetables in dry, rocky soils.
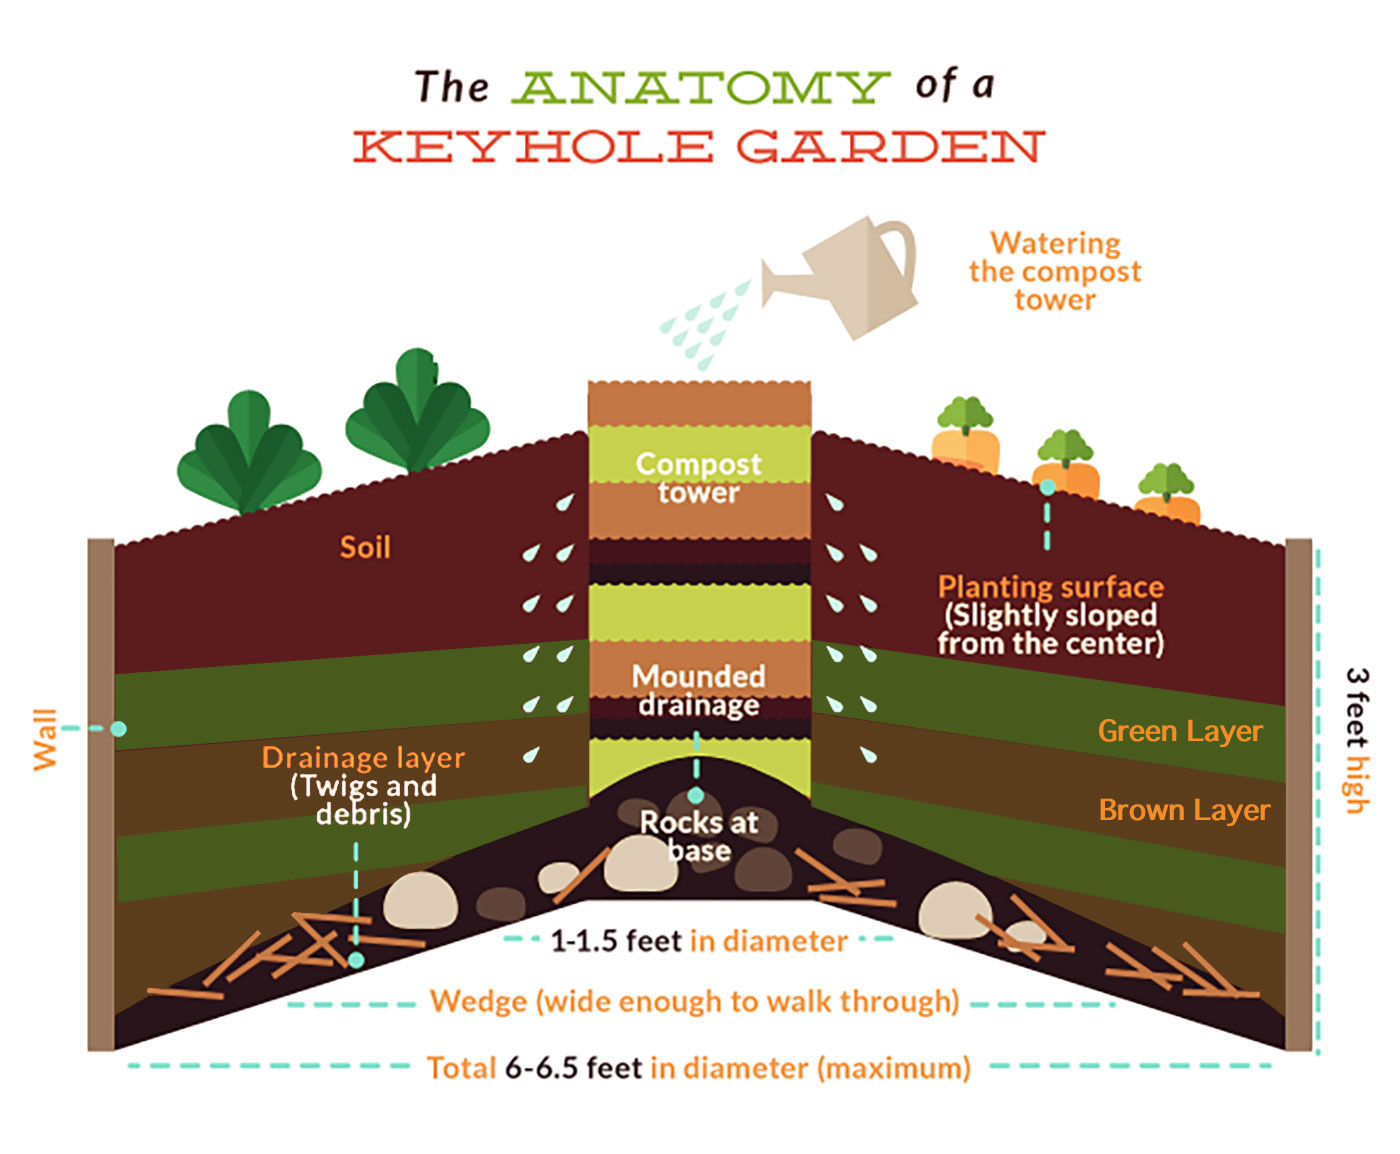

Today, it’s mimicked worldwide for a variety of reasons including recycling, high yield for limited space, great way to use compost, easier on your back and more. Basically, it’s a raised bed with a “keyhole” that makes it more accessible for planting, harvesting and composting your kitchen waste. The composted waste feeds the soil and supplies nutrients to the plants.
For those with smaller spaces, limited accessibility, health reasons and/or age, this design offers a great alternative. You also control the size of the garden though it’s recommended that you keep it to 6 ft in diameter or less to ensure that the water & nutrients reach the outer edges of your garden. Design with any material you want.
It’s all about layering, for example, the following illustration is from Backwoodhomes.com.
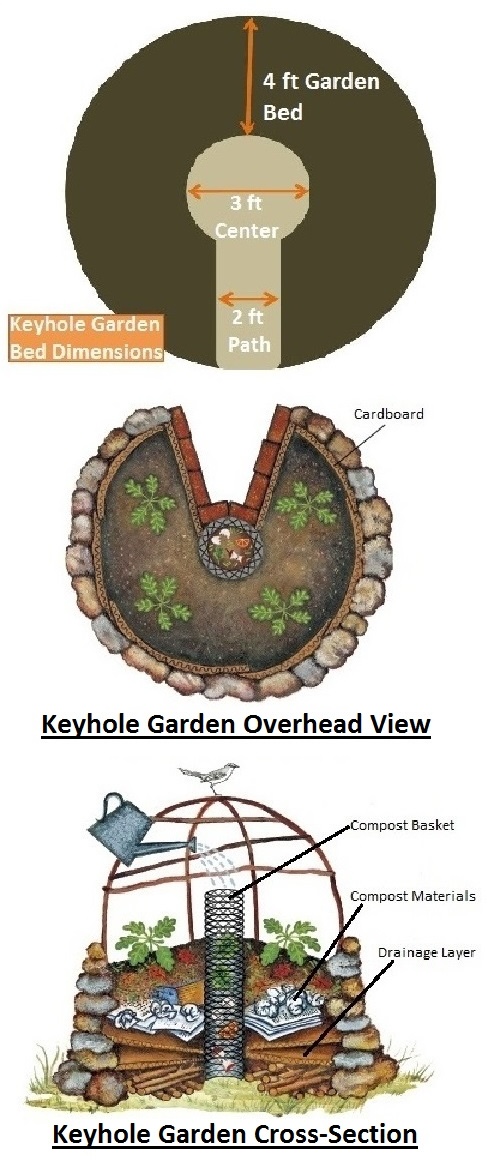

With this style of gardening, it’s best to have a level piece of ground. As for the sides, you can build them with nearly anything, including stones, bricks, logs and even wine bottles or any type of bottle. In this case you would fill them with sand and then mortar them together! From my research I’ve noted that most of the materials are leftovers from other projects including rocks, bricks, cement block, logs, wooden pallets and more. You can let your imagination go. The one caveat is that the outer material will not break down easily. *Note: some designs line the inside of the outer layer with cardboard or even newspapers.
As for the center where you place your kitchen scraps, I would suggest hardware cloth or chicken wire.
Find a full sun space in your landscape to build your keyhole garden. You do not have to remove grass or weeds, just make sure it’s on fairly level ground. It is suggested that you build the walls of your garden about 3 ft tall.
You’re ready to begin layering.
The first step is to ensure drainage for the bottom layer.
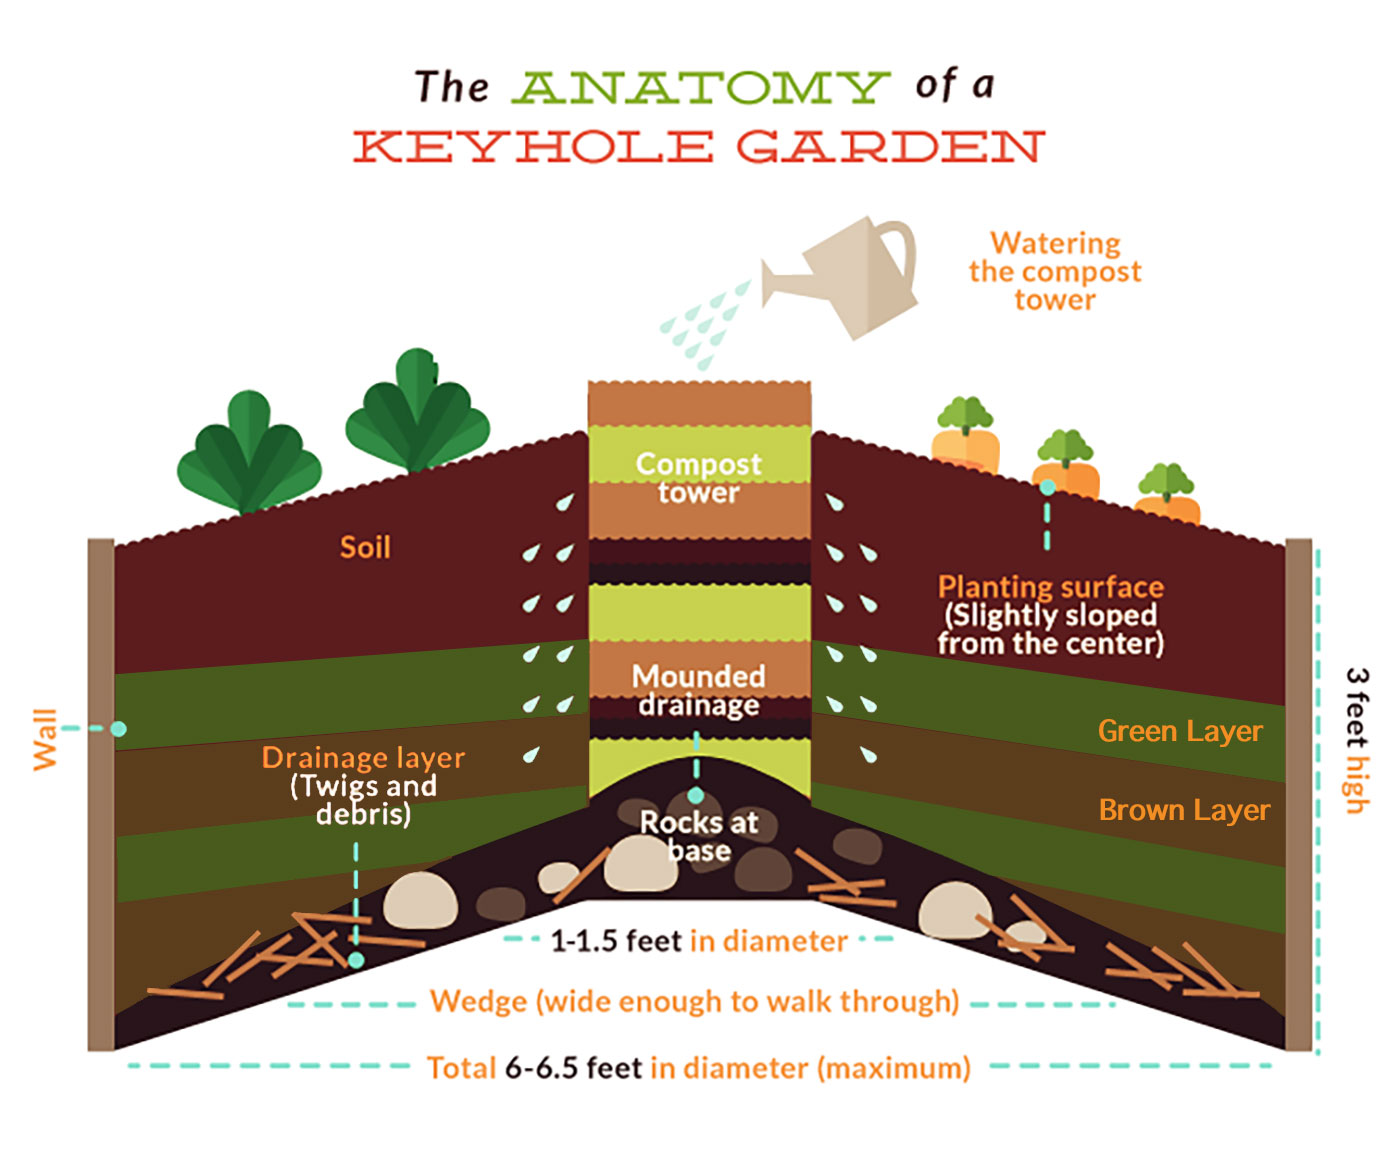

Use rocks, broken clay pots (if you have them) and various sizes of branches. Place your compost basket in the center. Here is a short list of possible choices for your layers.
Greens:
- Fresh cut green leaves & grass clippings
- Coffee grinds & tea bags
- Kitchen scraps, melon rinds, eggshells & fruit
- Manure – chicken/horse/cow
Browns:
- Fallen leaves
- Dead/dried plants including small rotting/spongy logs
- Twigs, shredded newspaper, chopped up cardboard
- Dryer lint
- Straw
Next up is your planting layer. Soil and bagged compost are a great mix. This layer needs to be the deepest to accommodate your growing plants. I would suggest at least 8 inches, you’ll likely need to add more as the soil/compost will settle.
Now it’s planting time! Keyhole gardens have been designed mostly for growing food. Suggestions include root and leafy vegetables such as carrots, beets, radishes and herbs. Hot peppers would be a good choice too. If it’s tomatoes you crave, find plants that are often grown in pots, ‘Sweetheart of the Patio’, ‘Tiny Tim’, ‘Little Bing’, ‘Tumbling Tom’ and more! Here is a link to Gertens list of Edibles. You can plant annual flowers if you’d like. What I would not plant are any perennials.
If you do a google search on Keyhole Gardens you will find a TON of designs. Layering is the key to a successful garden.


You’ve been adding your kitchen scraps to the center compost and have planted your garden. Water your plants at planting time. Theoretically you should then be able to just water the compost pile in the middle. The point is to nourish the surrounding bed from the bottom up. Continue to feed the compost with kitchen scraps and water! Watch the weather, watch your plants and water if they need it.
Staying keyed in,
The Garden Scoop

